The company CompanionLink also maintains some helpful information on how to setup the Palm Desktop on Windows 10 and Windows 11: https://www.companionlink.com/support/kb/How_To_Set_Up_Palm_Desktop_On_Windows_10_and_Windows_11
NOTE: if you are now using a 64-bit version of Windows on a 64-bit desktop, you may find the Palm Desktop won’t install as it usually requires a 32-bit operating system. However, you may wish to pursue that issue further - PimlicoSoftware has successfully installed the V-6.2.2 Palm Desktop software on the latest (2026) Windows-11 release. It's thought that maybe the prior V-6.2 version had the problem. If you do have this issue even with V-6.2.2, you would need to create a Windows XP or Windows 7 partition INSIDE your current Windows 10/11 OS. Do a Google Search for: how to create a windows xp partition inside windows 11 and you will see lots of YouTube videos and instruction pages on how to accomplish that. If you need to sync using USB, Pimlical maintains links on its website to the old Palm Drivers:
Synching via USB on 64-bit versions of Windows:
https://www.PimlicoSoftware.com/Palm%20Garnet%2064%20bit%20USB%20Drivers%20-%20DVR_WINX64_USB_GN4-GN5_20110322.zip
and for 32-bit versions of Windows:
https://www.PimlicoSoftware.com/Palm%20Garnet%2032%20bit%20USB%20Drivers%20-%20DVR_WINX32_USB_GN4-GN5_20110322.zip
Palm's V-6.2 desktop states that it only works with newer Palm devices (i.e. the devices with the newer PIM databases: Calendar, Contacts, Tasks and Memos). However, Pimlical has a free utility that fixes the Windows Registry so the V-6.2 Palm desktop to work with the older style legacy databases (Datebook, Addressbook, ToDo and MemoPad). There is a link to this utility (PalmHotSyncSetup.exe) on the Pimlico Home Page at https://www.PimlicoSoftware.com (see link near the bottom of the page).
Then you need to install Java 7 (Java 8 won’t work with Microsoft MDB Databases);
https://www.PimlicoSoftware.com/jre-7u79-windows-i586.exe
Install Pimlical/Desktop (uninstall and reinstall P/D if already installed). In the initial install Dialog:
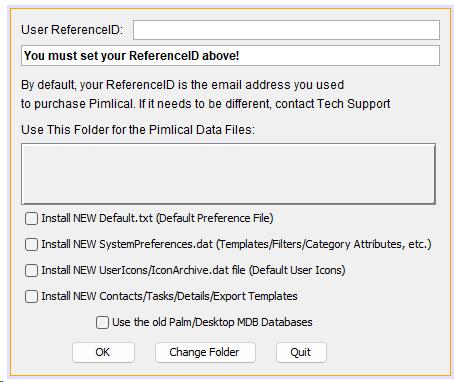
Check the box Use the old Palm/Desktop MDB Databases, then click on Change Folder and navigate to where your Palm data is stored. Palm did not follow Windows Conventions and usually stores its data in a sub-directory of the DOCUMENTS folder. You can easily find where Palm put its data by using File | Open Archive in the Palm Desktop and the path will then be visible.
Alternatively, you can leave the default folder for Pimlical (probably better if you are going to use Pimlical from this point forwards), which follows the Windows Convention: C:\Users\{Your Windows Name}\AppData\Roaming\Pimlico\Pimlical. You will need to install Pimlical first to get the default folders setup (does not matter if you check that checkbox just to get it installed). Of course you won't see your data yet, but you can exit Pimlical and manually copy the four folders with your Palm data (Datebook, Todo, Address, Memopad) so they are the same level as the Pimlico folder in the above path (i.e. you should see the Pimlical, Datebook, ToDo, Address, Memopad folders all listed as sub-folders of the Pimlico folder). Then uninstall/reinstall Pimlical/Desktop so you get that initial install dialog displayed and this time, make sure you check the box to use the Old Palm/Desktop MDB Databases.
You should now be able to see your calendar/contacts/and Memos databases from the Palm devices. Now, we save all three databases in the new DAT format that Pimlical currently uses:
1. Change the Preferences: SynchronizeWithPalmOS, PalmuserHasDateBk, SynchronizeDateBkTemplates all to FALSE.
2. Save calendar in new format: File | Save Calendar
3. Tap on the Contacts button – answer positively to converting the database.
4. Tap on the memos Button (that converts it)
5. Exit Pimlical/Desktop and uninstall it, also uninstall Java 7
6. Go to www.java.com and install latest version of Java-8 (make sure you install for the correct OS!).
7. Reinstall Pimlical/Desktop and in initial install dialog, if you see the checkbox for using the Old Palm OS databases, this time make sure you do *not* check it
You now have as your local databases in Pimlical, your Palm OS calendar, memos and contacts.
If you want to MERGE that old Palm OS data with existing Pimlical Databases, or have to do all the above in a WinXP partition, then before Step 1 above, in your current Pimlical install (not in the partition) do a Menu | Backup | Backup Everything, OR make a full copy of your Pimlical folder and sub-folders and save it elsewhere.
Then, follow all the above steps but add these steps:
8. Tap on Advanced Find Button in main view.
9. Click on CLEAR button, then Right-Click the FIND+ button.
10. In the Display results dialog, click the EXPORT + button, provide a filename and navigate to a folder outside of the Pimlical folder
11. Tap on CONTACTS button, make sure that ALL contacts are displayed (if you used the INACTIVE feature, and want to keep them, be sure to check the Inactive checkbox to include them). Then tap on EXPORT button at top right and provide a filename, again saving the file OUTSIDE of the Pimlical folder.
12. Tap on MEMOS button, make sure all memos are displayed, and tap the EXPORT button, select an EMPTY folder outside of Pimlical (create a new folder before doing this step if necessary) and all memos will be exported as individual TXT files in that folder.
13. Unless you were doing the above in a WinXP/7 partition, Do Menu | Backup | Restore Everything to restore ALL your original calendar/contacts/memos, and then relaunch Pimlical/Desktop, verify that everything looks like it restored normally. If you were running in a partition, switch to your main Windows 11 partition at this point.
14. Go into Menu | File | Import iCalendar and locate the file you saved in Step 10 to import it. Note that if you wish, you could set the preference ICalendarImportCategory to a specific category to import the events (such as PalmOS).
15. Tap on Contacts button in main view, and tap on IMPORT button at top right, select the file you saved in Step 11 above.
16. Tap on Memos button in main view, then the IMPORT button and select the folder that you saved your memos to in Step 12 above.
You should now have all your old Palm OS data merged into your existing data. Note that if you were running Pimlical/Desktop in a Windows Partition, you might have to copy those three files saved in steps 10/11/12 to your current partition so you can access them.
Converting your custom icon collection in DateBk
First - are you tracking Icons by resource ID in DateBk? You should be and will need to be to convert the collection. If you aren't, or not sure, go into Advanced Settings in DateBk and see if that box is checked. If not, you will need to run Icon Manager (which you can download from any Palm Software archive) and use the option to Renumber Icon IDs... in the IDs menu to renumber them from 0 and then save the file and check the box in DateBk to track icons by resource ID.
Next, you will need to run PimlicalIconToolSetup.exe program which was installed in the default installation program path (normally: C:\Program Files\Pimlico\Pimlical) and run that to install the icon conversion utility. Launch the Icon Tool and tap on the button with the three dots to the right of Input File and navigate to the backup folder where your icon collection is stored as a PRC type file (usually this folder is something like: C:\Program Files\Palm\{HotSyncUser name}\Backup or with V-6.2 - C:\Documents And Settings\{windows user name}\My Documents\Palm OS Desktop\{Palm user name}\backup). The default filename for the icon collection is: Icons-DateBk.prc.
Then click on [...] button to right of Root of Bitmap Output Folders and select a folder where you want the icons to be extracted to (makes no difference, but do remember where you put these files!). Then click on Extract Icons button to convert the icon collection to individual files in PGN format.
Finally, launch Pimlical/Desktop and go into Icon Management in the Options menu and then tap the Import button. Navigate to the folder where you converted all the icons. Select the appropriate sub-folder - they are sorted by bitmap density - you'll probably want either the 8-Bit D72 or the 8-Bit D144I folder. Select any file in that folder (doesn't matter which one as all will be imported) and tap the Open button. All your icons are then displayed and imported. A file with the name IconArchive.dat is created with those icons, and this file can be copied to Pimlical/Android so icons display on that platform too.